
Rulebook
Version 2.


It was Ret-Talus, the lord of the Fallen Kingdom,
who found the first Summoning Stone. The stone
bestowed its power onto the dark-hearted king,
changing him into the first of the Summoners. For a
thousand years Ret-Talus went unchallenged as he
and his summonings wrought havoc upon the
world of Itharia. The power of the stone was so
great, that though the world sent entire armies to
fight against him, none could defeat Ret-Talus.
It was not until Dane Lightbringer discovered a
second Summoning Stone, that Ret-Talus’s reign
was put in check. The discovery of a second stone
gave a new hope to the people of Itharia for not
only did it mean that Ret-Talus’s power might be
countered, but it also meant that the Summoning
Stone was not unique. If there were two, surely
there were more. Every faction of Itharia began
pouring their resources into scouring the world for
a Summoning Stone to claim as their own.
More stones were revealed, and more Summoners
emerged, but the Summoners of Itharia have
failed to unite against their common threat
and have instead let old faction rivalries and
the desire for more Summoning Stones turn them
against one another, and so it is that...
The Summoner Wars
have begun!

2
Object of the Game
In Summoner Wars you are playing the role of a Summoner. You have
been endowed by a Summoning Stone with the ability to call forth
mighty warriors and cast powerful spells to aid you in your battle against
an opposing Summoner. The object of the game is to destroy your
opponent’s Summoner card. When you are the only player with your
Summoner card left in play, you win.
Components
1 Rulebook
•
1 Battlefield Board
•
5 Six-Sided Dice
20 Wound Markers
•
225 Cards
Unit Cards
Unit Cards represent the forces, called Units, which make up your army.
Everything from your all-important Summoner down to your lowliest
Scout, are Units represented by a Unit Card.
Anatomy of a Unit Card
1. Attack Value: When attacking with a Unit, roll a number of dice equal
to that Unit’s Attack Value.
2. Summon Cost: This is the number of Magic Points you’ll have to
spend to bring the Unit onto the Battlefield.
3. Special Ability: Special rules unique to the Unit.
1
2
3
4
7
6
5
8

3
4. Range Symbol: Unit Cards with a bow symbol on them can attack
cards that are up to 3 clear straight line spaces away.
Unit Cards with a sword symbol on them must be
adjacent to other cards to attack them.
5. Unit Name: Champions and Summoners have unique names like Lun
or Krusk. Common Units have generic names like Shaman or Warrior.
Some Special Abilities and Event Cards will reference Units by name.
6. Unit Type: There are 3 different types of Unit Cards: Summoners,
Champions, and Commons. Some rules, Special Abilities, and Event
Cards will make reference to certain types of Unit Cards.
7. Life Points: Each colored dot represents 1 Life Point. When attacking,
you will place 1 Wound Marker on a Unit Card for every Hit rolled
against that Unit. When a Unit Card has a number of Wound Markers
equal to or greater than it’s Life Points, that Unit is destroyed.
8. Character Art: An artistic representation of the Unit. Character art
has no effect on game play.
Event Cards
Event Cards represent special
events like the casting of a spell
or the rallying of your forces.
Event Cards are made up of just
2 parts: The card’s name and its
effect on the game.
Event Cards can be played on your turn during your Play Event Cards Phase.
Wall Cards
A Wall Card is a special type of
Event Card. Wall Cards do not
have a card name or a game effect
listed on them; only a picture
of a wall and a number of Life
Points. Walls are not Units, but
can be attacked and destroyed
like Units. However, Walls are not affected by Abilities or powers which
only affect Units. During the Event Card Phase you can play a Wall Card by
simply placing it on any empty space on your side of the Battlefield.
Bow Sword

4
Walls serve 2 purposes. The first is protection. Walls give your Units
something to hide behind and they block your opponent’s movement.
Second, they are a summoning point. When summoning Units to the
game they must be placed adjacent to a Wall Card that you control. Walls
can be attacked and destroyed just like Units. Be careful - if you control
no Walls you cannot summon more Units to your aid.
Vine Walls
The Swamp Orcs have a special
kind of Wall called a Vine Wall.
The back of each Vine Wall card
has the basic rules for Vine Walls
printed on it. The full rules for
Vine Walls are as follows.
(The italic text in the rules below is omitted from the Vine Wall basic
rules for the sake of brevity.)
Vine Wall cards are not shuffled into your deck. Instead, each player that
has Vine Walls listed on his Summoner’s Reference Card starts the game
with that many Vine Wall cards in a Vine Wall Pile off of the Battlefield.
Whenever a card instructs a player to place a Vine Wall, remove a Vine
Wall from that player’s Vine Wall Pile and place it as directed. Vine Walls
are considered Wall cards for all purposes with the following exceptions:
1. Life: Vine Walls have 2 Life Points.
2. Placement: Vine Walls can be placed on any space on the Battlefield,
including on your opponent’s side! A Vine Wall can be placed on a
space where a Unit already exists, place the Vine Wall under the
existing Unit. However, you can never place a Vine Wall on a space
where a Wall (including a Vine Wall) already exists. A Unit cannot
be summoned onto a space containing a Vine Wall, but they can be
summoned adjacent just like any other Wall.
3. Movement: Units can move or be placed onto a space containing a Vine
Wall. When a Unit moves off of a space containing a Vine Wall, roll a die.
On a result of 3 or lower, that Unit receives 1 Wound Marker and cannot
move off of the Vine Wall space. On a Result of 4 or higher, that Unit
moves normally. A Unit can never use an Event or Special Ability to move
through a Unit that is on a Vine Wall.
4. Attacking: A Vine Wall can be attacked even if there is a Unit sharing
a space with it. A player must declare whether he is attacking the Unit
or the Vine Wall before attacking.
Units on a Vine Wall space are

5
considered to be adjacent to that Vine Wall and can attack it. A Vine
Wall blocks line of sight just like a normal Wall, even if there is a Unit on
top of it. However, it does not block line of sight to or from that Unit
on top of it. Those Units that share spaces with Vine Walls can attack
and be attacked from any direction unless blocked by another card.
5. Destroying: When a Vine Wall is destroyed, it is placed back onto the
owner’s Vine Wall Pile rather than a Magic Pile.
Some Special Abilities, such as Blerg’s Adapt Ability, refer to cards that
are placed underneath them and impact them in some unique way. For
the sake of interpreting the rules surrounding such Abilities, Vine Walls
are NOT considered to be a card under those Units. Remember that a
Unit on a Vine Wall space is considered adjacent to that Vine Wall, even
though they are sharing a space.
Battlefield
The Battlefield is where the action happens. The Battlefield comes in 2
halves, separating your side of the Battlefield from your opponent’s side.
The Battlefield is further divided into card-sized spaces. These spaces
will be used for measuring distance and card placement. On either end
of the Battlefield are 3 marked areas for the cards you’ll use during the
game: The Draw Pile, the Magic Pile, and the Discard Pile.

6
Game Setup
1. Unfold the Battlefield and place it on a flat surface between the
players with the card piles facing the players.
2. Remove the dice and Wound Markers and place them off to the side of
the Battlefield in separate piles within reach of all players.
3. Each player chooses a card deck. Each card deck has a unique color and
symbol which denotes which cards belong in that deck.
4. Every deck includes a Reference Card to aid the player. Keep this handy.
5. Each player checks their Reference Card and puts their “Starting
Setup” cards on the Battlefield as shown on their Reference Card.
Each player should place their cards so that they can be read right-
side up from their side of the Battlefield. This will help you easily
identify which cards you control on the Battlefield.
6. Players shuffle their remaining cards and place them face-down on
their Draw Pile section. Players start the game with NO cards in
their hand.
7. Each player rolls a die. The player with the highest roll chooses who will
take the first turn. Re-roll ties. The player who takes the first turn of the
game must skip phases 1 – 3 of the Turn Sequence, and instead must begin
their turn with the Movement Phase. During that first Movement Phase
the player going first can only move with up to 2 Units, instead of the
normal 3. The player may then complete the rest of that turn normally.
Turn Sequence
Each turn in Summoner Wars is divided into 6 phases, which must be
played in order.
1. Draw
2. Summon
3. Play Event Cards
4. Movement
5. Attack
6. Build Magic
After a player completes all 6 phases, it becomes their opponent’s turn.

7
Phase 1: Draw
Draw cards until you have 5 cards in your hand (Example: if you start
your turn with 3 cards in your hand you will draw 2 cards). If your Draw
Pile is empty, you can no longer draw cards and must finish the game with
the remaining cards on the Battlefield (including the Magic Pile) and in
your hand.
Phase 2: Summon
During this phase you may summon Units to the Battlefield. To summon
a Unit you must pay its Summon Cost by spending Magic Points. To
spend a Magic Point, remove 1 card from the top of your Magic Pile and
place it face-up in your Discard Pile. To spend 2 Magic Points remove
2 cards from the top of your Magic Pile and place them face-up in your
Discard Pile, etc. (For example: you want to summon your Goblin
Champion Kreep to the Battlefield. Kreep has a Summon Cost of 4,
so to summon Kreep you must first remove 4 cards from the top of
your Magic Pile and place them face-up on your Discard Pile). Next
you must place the summoned Unit onto an empty space adjacent to a
Wall Card that you control. If you do not have enough cards in your
Magic Pile to pay a Unit’s Summon Cost or there are no empty spaces
adjacent to a Wall Card that you control, you cannot summon that Unit.
You can summon as many Units as you have in your hand and can afford
to pay the Summon Cost for, so long as there are enough empty spaces
adjacent to Walls that you control.
Adjacency
A card is only considered adjacent to another card when it occupies
1 of the 4 spaces directly next to that card. Spaces that are diagonally
connected to other spaces are not considered to be adjacent.
Phase 3: Play Event Cards
During this phase, you may play Event Cards, including Wall Cards.
There is no limit to the number of Event Cards you can play in a single
turn. Event Cards are played 1 at a time and are resolved immediately.
After playing an Event Card, place that card face-up in your Discard
Pile. Note: some Event Cards state that a certain requirement must be
met before the card can be played. You must meet all listed requirements
before playing such a card. Note: to play a Wall Card you simply place
the card on any empty space on your side of the Battlefield.

8
Phase 4: Movement
During this phase, you may move up to 3 of your Units. They may move
up to 2 spaces each. Cards cannot move diagonally. Cards cannot move
through spaces occupied by other cards. Cards must end their move on an
unoccupied space. No Unit can be moved more than once per Movement
Phase unless an Event or Special Ability directs otherwise.
Some Special Abilities activate when a Unit moves. A player may
announce that they are moving a Unit 0 spaces in order to activate such an
Ability without having to move that Unit from its current space. Doing
this counts as moving 1 of the 3 Units you are allowed to move during a
Movement Phase.
Examples of correct movement
1
2
1
2

9
Phase 5: Attack
During this phase, you may attack with up to 3 different Units that you
control on the Battlefield. The Units that you choose to attack with do
not have to be the same Units that moved in the previous phase. No Unit
can attack more than once per Attack Phase unless an Event or Special
Ability directs otherwise. If a Special Ability or Event allows a Unit to
attack multiple times that Unit still only counts as 1 of the 3 Units you
are allowed to attack with during this Phase. Resolve each attack before
moving to the next. When attacking a Unit, if you destroy that Unit,
place that Unit Card face-down on top of YOUR Magic Pile.
You may attack and destroy your own cards but a Unit cannot attack
itself. When attacking with a Unit you must roll using that Unit’s entire
Attack Value.
Attacking with a Unit Card that has the Sword Symbol on it: Unit Cards
with the Sword Symbol on them can only attack adjacent cards. Spaces that
are diagonally connected to other spaces are NOT considered to be adjacent.
Units cannot attack diagonally
Attacking with a Unit Card that has the bow symbol on it: Unit Cards
with the bow symbol on them can attack cards that are up to 3 spaces
away. You can only attack a card that is within a straight line from
the attacking Unit Card, either vertically or horizontally; you cannot
attack diagonally. You cannot attack a card that is blocked by
1 or more other cards.
Cannot Attack
Adjacent Attack

10
Example of a card blocking a ranged attack
Ranged units must attack in a straight line
Attack blocked by another card
Ranged attack

11
Resolving an attack and building your Magic Pile
To attack, roll a number of dice equal to the attacking Unit’s Attack Value.
There are 2 types of die results:
•
Rolling a 3 or higher is a Hit result.
•
Rolling a 2 or lower is a Miss result.
For every Hit result rolled, add one Wound Marker to the card that is
being attacked. The Wound Markers are double sided. If you place the side
WITHOUT the 3 on it face-up that represents 1 Wound Marker. If you
place the side WITH the 3 on it face-up that represents 3 Wound Markers.
If your attack has added enough Wound Markers to destroy a card, you
then place the destroyed card face-down on top of your Magic Pile, thus
supplying yourself with more power to summon your Units to the battle
on your next Summon Phase.
An example of an attack
Splub attacks a Miner, rolling 3 dice (Splub’s Attack Value is 3). One
die shows a 2, another die shows a 4, and the last die shows a 6, so Splub
has rolled 2 Hits (the 4 and the 6) on the Miner, adding two Wound
Markers to the Miner’s card. Since the Miner only begins the game with
2 Life Points, the attack is enough to destroy it and the Miner card is
placed on top of the Magic Pile of the player attacking with Splub.
Phase 6: Build Magic
During this phase, you may take any number of cards from your hand
and put them face-down on top of your Magic Pile. This builds up your
Magic Pile and frees up your hand so that you can draw more cards on
your next turn. You may look at the cards in your own Magic Pile, but
you cannot rearrange the order they are in.
Special Abilities
Every Unit Card in Summoner Wars has a Special Ability. Special
Abilities ‘break’ the rules of the game in some way. Special Abilities take
precedence over the regular rules. For example: the rules state that Unit
Cards can only move up to 2 spaces each during your Movement Phase.
However, Units with the ‘Swift’ Special Ability may move an additional
space when they are being moved during your Movement Phase.

12
Special Abilities are not optional, with the exception of Special Abilities
that take the place of an attack. Special Abilities that take the place of
a standard attack are always optional, as are Special Abilities that use the
term “may”, as in, “You may move up to 2 additional spaces.” Using a
Special Ability that takes the place of a standard attack counts as using
one of the 3 Units you can attack with during your Attack Phase.
Victory
You are victorious when you are the only player with a Summoner on the
Battlefield.
Terminology Clarifications
Discard: Whenever the terms ‘discard’ or ‘discard from the Battlefield’
are used, the card being discarded is always put face-up into the Discard
Pile of the player discarding the card, and not necessarily the player that
owns that card.
Destroy: Whenever a card is ‘destroyed’ it is placed face-down on top of
the Magic Pile of the player that destroyed that card, and not necessarily
the player that owns that card.
Through: Some movement abilities use the term ‘through’. A card is not
considered to have moved through another card until it has moved onto
and then back off of that card. So for example in Torodin’s Trample
ability it states: ‘Torodin may move through Common Units. Every Unit
that Torodin moves through receives 1 Wound Marker. Torodin must end
his move on an unoccupied space.’ In the case of Torodin’s Trample the
Unit he is trampling does not receive the wound until Torodin moves
onto and then back off of that Unit.
Place or Exchange Places: Some Special Abilities use the term ‘place’
as in ‘… place this Unit adjacent to a Wall card…’ or ‘exchange places’ as
in ‘…this Unit may exchange places with an adjacent Unit…’ For rules
purposes placing a Unit or having a Unit exchanging places with another
card is not the same thing as moving that Unit.
You Control and Friendly: When a card refers to a card ‘you control’
that means a card on the Battlefield that was placed there by you or that
you gained control of by the use of an Event or Special Ability. Two
players cannot control a card at the same time, so if another player ever

13
gains control of your card for any period of time, you lose control of that
card for that period of time. When a card refers to a ‘friendly’ card, that
means a card on the Battlefield that either you or a teammate controls.
Wounds vs. Hits: Most of the time when you Hit a Unit you inflict a
Wound on that Unit, but there are Special Abilities that change that rule.
For example the Tough Ability states: ‘When an opponent rolls to attack
this Unit, this Unit only receives Wound Markers from die results of 4
or higher during that attack.’ So it is possible to Hit a Unit with all of
the dice you rolled for an attack, but only Wound that Unit with some
of those Hits. Other Special Abilities let you avoid rolling dice and
inflicting Hits altogether. For example the Precise Ability states: ‘When
attacking with this Unit, instead of rolling the dice, count the number of
dice that would be rolled. Place that number of Wound Markers on the
Unit that is being attacked.’ So in the case of Precise, the Unit is not
Hit by the attack, but instead just receives Wounds equal to the number
of dice that would be rolled for that attack. The Sluggish Ability
works in a similar way. It states: ‘When this Unit is attacked, instead of
rolling the dice, count the number of dice that would be rolled. Place
that number of Wound Markers on this Unit.’ If a Unit with the Precise
Ability ever attacks a Unit with the Sluggish Ability, you only count
the dice that would be rolled for that attack once, and inflict that many
Wounds. You do not count them once for each Ability.
Discarded cards are always put face-up into a Discard Pile and destroyed
cards are always put face-down on top of a Magic Pile unless a card’s text
specifically directs otherwise. During the game your cards are going to
get mixed in with your opponent’s cards. At the end of every game you
will need to separate your cards back out into their original decks.
Some Special Abilities, such as Blerg’s Adapt ability, tell you to place
cards underneath a Unit Card that is on the Battlefield.
•
Whenever you move a Unit that has other cards beneath it, all of the
cards beneath it move with that Unit.
•
When a Unit with other cards beneath it is destroyed, that Unit Card
and all the cards beneath it are placed face-down on top of the Magic
Pile of the player destroying that Unit.
•
When a Unit with other cards beneath it is discarded, that Unit Card
and all the cards beneath it are placed into the Discard Pile of the
player discarding that Unit.

14
•
Vine Walls are an exception to the above rules. A Vine Wall can be
under a Unit card, but for the purposes of rules interpretation, they are
not treated like a card under that Unit card.
When counting spaces for any purpose, never count diagonally. The only
exception to this rule is Special Abilities that specifically allow a Unit to
attack diagonally. This means when you figure out the range of a Special
Ability, if that Special Ability doesn’t specify ‘straight line spaces’ count
the spaces to the affected Unit like you would count out movement.
Some Events and Special Abilities allow you to move or attack with Units
outside of your normal Movement and Attack Phases. For example:
RELENTLESS
Goblin Fighters do not attack during your Attack Phase. Instead,
immediately after your normal Attack Phase, you may attack with up to
2 Goblin Fighters that you control.
In the above example, the Goblin Fighters are a Unit that do not attack
during your Attack Phase and so do not count toward the total number
of Units you are allowed to attack with during your Attack Phase on that
turn. Moves and attacks taking place outside your normal Movement or
Attack Phases are considered free movements and attacks. So in the above
example you can always attack with up to 2 Goblin Fighters in addition
to attacking with the 3 Unit Cards you are allowed to attack with during
your normal Attack Phase.
Some Event Cards give Units a temporary Special Ability. A Unit
can acquire multiple Special Abilities in this way, but multiple Special
Abilities of the same name do not stack with one another. For example:
If you play a DUCK AND COVER Event Card, giving your Sand
Goblins the CAMOUFLAGE Special Ability, playing another DUCK
AND COVER would be of no effect, as it would not improve the
CAMOUFLAGE Special Ability already in place in any way.
The effects from multiple Event Cards can stack together, including
the effects from multiple Event Cards of the same type, but as already
established Special Abilities of the same name do not stack. For
example: If you play a STALKING ADVANCE Event Card to
move each of your Shadow Elves 1 space, you could then play a second
STALKING ADVANCE Event Card to move each of your Shadow
Elves 1 space again.
15
If the effects from 2 Special Abilities or Event Cards ever trigger at the
exact same time, the player whose turn it is determines in which order
those effects will resolve. Likewise if an attack ever Hits multiple Units
at once the attacker chooses in which order they are Hit.
If an Event or Special Ability says that you can use it at any time, you
can use it at any time during your turn or in between any phase of your
opponent’s turn.
When a Special Ability or Event allows you to take control of an
opponent’s card, make sure that you turn that card so that it can be read
right-side up from your side of the Battlefield. If control of that card
returns to your opponent it should then be turned again so that it can be
read right-side up from your opponent’s side of the Battlefield. This helps
you track which cards you control and which cards your opponent controls.
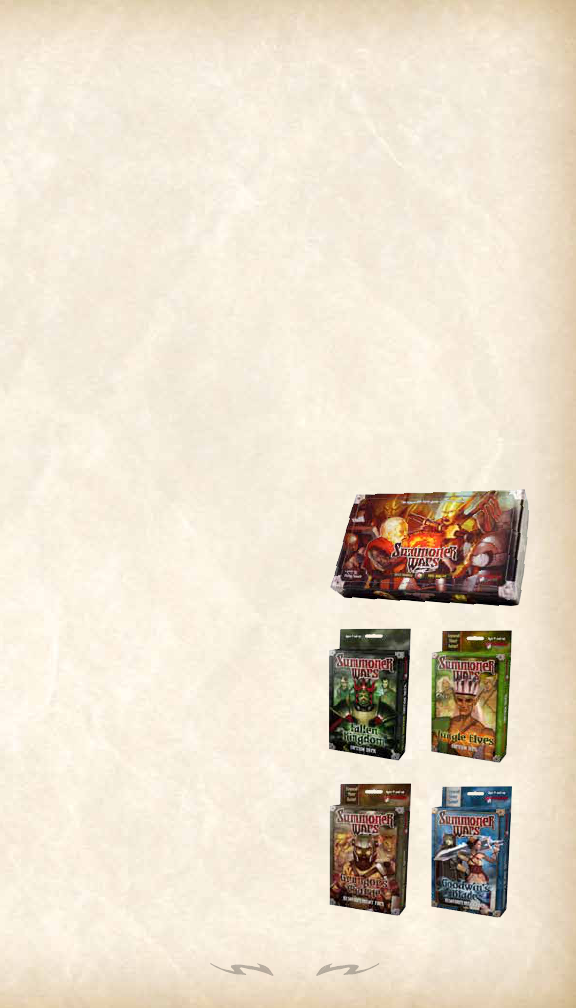
Expanding the Game
In addition to this Master Set there are 3 other types of Summoner Wars
Products Available.
Starter Sets
These contain 2 complete Faction Decks,
a paper mat, dice, Wound Markers and a
rulebook. Giving you everything needed
to duel with 2 ready to play decks.
Faction Decks
These contain 1 complete ready to play
Faction Deck.
Reinforcement Packs
These contain Units for a variety of
factions as well as Mercenary Units.

16
Deck Building
In this set all of the Faction Decks are built for you and ready to play.
However as you collect more Summoner Wars products you will be able
to custom build a deck that fits your personal play style.
Mercenaries
In other Summoner Wars products you will find a special kind of Unit
Card called Mercenaries. Mercenary cards are gray and don’t have a
faction symbol. Mercenary cards can be included in ANY deck, up to a
maximum of 6 Mercenary cards in a single deck. Note: Mercenaries will
have a different color of card back than the rest of the cards in your deck.
This means that players will be able to tell when you have a Mercenary
card on top of your Draw Pile or in your hand.
How to Build a Custom Deck
•
To custom build a Summoner Wars Deck you must start by choosing a
Summoner. Collect that Summoner’s Unit Card and Reference Card.
•
On your Summoner’s Reference Card is a list of Event Cards. You
must include in your deck each of the Event Cards listed and no more.
•
Also found on your Summoner’s Reference Card is a ‘Starting Set-
Up’. A Summoner’s Starting Set-Up is used to determine which cards
will start the game on the Battlefield, and where on the Battlefield
they will be placed when playing with that Summoner. You must
include in your deck each of the cards that will be used in your
Summoner’s Starting Set-Up.
•
Next add 2 Wall Cards to your deck.
•
Finally, add enough Unit Cards to your deck so that you have a total
of 18 Common Units and 3 Champion Units in your deck. All of the
Units in your deck must belong to the same faction as your Summoner,
with the exception of Mercenary Unit Cards. You can never have more
than 1 copy of a specific Champion Unit in your deck and you can never
have more than 10 copies of a specific Common Unit in your deck.
This means your custom deck will have a total of 1 Summoner, 9 Event
Cards, 3 Wall Cards, 18 Common Units, and 3 Champion Units in it.

17
Adding More Players
There is only 1 Battlefield included in this Master Set allowing for 2
players to battle each other. However with the purchase of an additional
Master Set, a Starter Set, or an additional Battlefield board you can play
with up to 4 players.
3-4 Players
1. To play a game with 3-4 players start by placing 2 Battlefields next to
each other as shown in the example on page 20 of this rulebook.
2. Next divide the players into 2 teams. Each player will select a deck and
place their Starting Setup cards on the Battlefield. In a 3 player game
1 of the players will be on a team by themselves and that player will
select 2 decks and play each of the 2 separate decks on 2 separate turns.
When interpreting the rules a player who is playing 2 decks is treated
as 2 separate players with 2 separate turns.
3. Everyone rolls a die. The player with the highest roll must take the
first turn. Re-roll ties.
4. Play then passes back and forth as shown in the diagram on page 21.
When playing a 3-4 player game, it is possible that both players on 1 side
may choose to play with a deck that includes Units that their teammate is
also playing with. To help track which cards belong to which player, you
may wish to sleeve your cards in an identifiable manner.
You may want to sleeve your cards in an opaque backed sleeve for
tournament situations so that it is easier to identify your cards from an
opponent’s when you are both playing the same faction. This will also
cover up which of your cards are Mercenaries. It is not only okay to do
that, we suggest that you do.
Rules for 3-4 Players
The rules for 3 or more players are the same as the rules for 2 players
with a few additions:
1. When placing Wall Cards you may place them anywhere on your
team’s side of the Battlefield.
2. When moving, you may move from 1 Battlefield to the other, either
by moving across the sides of the Battlefield Boards that are next to
each other, or by moving from one far side of the Battlefield to the

18
other far side of the Battlefield, as shown in the example on page 20
of this rulebook. Note: moving and attacking from one far side of the
Battlefield to the other is not a legal move in the 2 player game.
3. Attacking works the same way as moving does in regards to having
multiple Battlefield Boards in play. You may attack across 1 Battlefield
Board, hitting a card on another Battlefield Board, as shown in the
example on page 20 of this rule book.
4. When a player’s Summoner is destroyed that player must discard all of
their remaining cards, remove their Draw Pile and Discard Pile from the
Battlefield, then place all of the cards in their Magic Pile face down on
top of their teammate’s Magic Pile. That player is now out of the game.
5. During your Build Magic Phase, in addition to being able to remove
cards from your hand and place them in your Magic Pile, you may also
remove any number of cards from your Magic Pile and place them
face-down on top of a teammate’s Magic Pile.
Credits
Lead Game Design
Colby Dauch • [email protected]
Assistant Game Design
Jake Ollervides • [email protected]
Mr. Bistro • [email protected]
Jerry Hawthorne • [email protected]
James Sitz • [email protected]
Michael Faciane • [email protected]
Illustration
John Ariosa • [email protected]
Gary Simpson • [email protected]
Graphic Design
David Richards • da[email protected]
Proofreader
Chris Dupuis • chris@plaidhatgames.com

19
Lead Playtester
James Sitz • [email protected]
Playtesters
Josh Rios, Joe Knapper, Curtis Adams, Cory Bullock, Brad Minnigh,
Cody Stevens, Jose Negron, Andrew Taylor, Mark Failor, ‘Alex Metz,
Mike Maloney, Tony Imholte, Michael Jordal, Cole Busse, Jay Key,
Pascal “Phoenixio” Lefebvre, Brian Failla, Dustin Wen, Taylor Kowbel,
Eddie Feeley, Tysen Streib, Matt West, Todd Carlson, Leo Hoffman,
Mike Jeter, Jimmy Johnson, Terry Knight, Fili Martinez, Jim McMahon,
W. Peter Miller, Rodney Phelps, Matt Robertson, Bryan Robles,
Owen Sorg, James Snyder, Sam Vollmar, Spoon Dupuis, Aaron Pearsons,
Nathan Bradley, Nathaniel Lewis, George Martinez Jr., Nathan Stephens

20
Move 2 Move 1
Attack
Attack
Movement
Attqack
Multiple examples of how to move and attack
in a 3-4 player game

21
Example of how play passes in a 3-4 player game.
Player 1 and Player 3 are on one team.
Player 2 and Player 4 are on the other team:
Player 1 passes to Player 2
Player 2 passes to Player 3
Player 3 passes to Player 4
Player 4 passes back to Player 1

www.plaidhatgames.com
Copyright © 2011, by Plaid Hat Games LLC.
