
Introduction to Mockups 2 for Confluence Server
docs.balsamiq.com/confluence/server/mockups2/intro
Welcome
This page contains usage instructions for Mockups for Confluence Server.
Using Confluence Cloud? If you are using Confluence Cloud (on atlassian.net), please see this article instead.
Confluence Server Administrators: the Mockups for Confluence Server Admin Guide is for you.
Creating a New Mockup
Adding a mockup to a wiki page is very similar to adding an image.
Edit the page, position the cursor where you’d like your mockup to be, then click on the Insert menu and select “UI
Mockup” from the list.
This will take you directly to the Balsamiq Mockup editor, where you can create your mockup (or import an existing
mockup).
Once you are happy with your mockup, just select “Save” from the toolbar or the Mockup menu. You will be asked
to give it a unique name. This is required and allows you to include more than one mockup on the same page.
Once you name your mockup you can continue working on it and saving it periodically.
When you are ready to go back to the wiki page, just click on “Close” or select “Close Editor” from the Mockup
menu. You will be taken back to the Confluence editor. Save the page and you’re done!
Note: Even if your Balsamiq Mockups license is configured so that only specific people can create and edit
1/4

mockups (explained in the Admin Guide), anyone with access to your Confluence site will be able to see them.
Editing a Mockup
To make changes to a mockup, edit the wiki page, select the mockup image and click on the “Edit” button in the
little macro control panel that shows up.
Deleting a Mockup
To remove a mockup from a page, simply edit the page, select the mockup and delete it or click on “Remove”.
Looking at a Mockup’s History
Each UI mockup is saved as two separate attachments, one for the PNG image and one for the BMML source
data. Confluence supports versioning of attachments, and Balsamiq Mockups takes advantage of it so that you
can see how your mockup evolved over time, or roll back to a previous version.
Rolling Back to a Previous Version of a Mockup
This is a bit tricky but it can be done. Go to the attachments view for your page, find the mockup you want to roll
back, get the BMML for the version you want to roll it back to and copy it. Now you can go back to the page, edit
the mockup and import your old BMML via the “Import” dialog.
Moving a Mockup on a Page
To move a mockup to a different location on a page you edit the page, select it in the editor and use cut and paste
to move it to another location on the page. Save the page and you’re done!
2/4

Aligning a Mockup on a Page
If you’d like to left-align or right-align the mockup’s image relative to your page, you can do so via the macro
control panel. Note that the macro won’t align while in edit mode, but it will show up with the right alignment once
you save the wiki page.
Specifying the Size of a Mockup on a Page
You can use the “Small”, “Medium” and “Original” buttons in the macro property panel.
Adding an Existing Confluence Mockup to a New Confluence
Page
You may want to add a mockup that you’ve already created in Confluence to a different page than you initially
created it for. Right now you can only add mockups that are attached to the same page. However, you can create a
copy of the mockup you want and add it to the new page. The fastest way to do that is via Export/Import. This
process involves exporting from the old one and importing into a new one. You can also see the steps below for
moving a mockup from one page to another.
Moving a Mockup from One Page to Another
It is possible to move mockups from one page to another. However, this is somewhat of an “advanced” feature, so
it’s not as easy as the tasks described above.
Here are the steps:
1. Go to the Attachments page and move both the .bmml and .png files (both file types should have a
“mockup_” prefix) to the page you wish to move the mockup to (refer to the Confluence documentation for
more information).
2. On the new page, Edit the page and type the following text:
1. {mockup:Name=
2. *the name of the mockup without the “mockup_” prefix or the .bmml extension (so “mockup_login
screen.bmml” would become “login screen”)*
3. }
resulting in something like this {mockup:Name=login screen}.
3. After doing this, you should see your mockup appear in the editor.
This process can also be useful if you have removed a mockup from a page and want to re-add it. In that case,
skip step 1 and follow steps 2-4.
Note: Any images used in mockups will have to be moved as well - and re-added to the mockup.
Renaming a Mockup
Similar to the process described above, renaming a mockup is possible, but you have to go behind the scenes to
do it.
Here are the steps:
1. Go to the Attachments page and rename both the .bmml and .png files (click on Properties and change the
file name). Make sure to keep the “mockup_” prefix for both files.
2. Go back to the page the mockup was on (you should see an error where it used to be).
3. Edit the page, then delete the macro placeholder for the old mockup name.
4. In its place, type the following text:
1. {mockup:Name=
3/4

2. *the name of the renamed mockup without the “mockup_” prefix or the .bmml extension (so
“mockup_new name.bmml” would become “new name”)*
3. }
resulting in something like this {mockup:Name=new name}.
5. After doing this, you should see your mockup appear in the editor.
Exporting a Mockup
Mockups for Confluence Server allows you to export your mockup to XML format so that you can import it to our
other versions. It is not currently possible to export directly to PDF or an image (PNG, etc.) from the Balsamiq
Mockups editor.
As mentioned above, however, you can access your mockups in PNG image format by going to the attachments
for the Confluence page.
You can also take advantage of the ability to export to PDF within Confluence to export your wiki page, including
any mockups, to PDF.
4/4

Mockups 2 for Confluence Server Admin Guide
docs.balsamiq.com/confluence/server/mockups2/admin-guide
Welcome
The Mockups 2 for Confluence Server Admin Guide contains installation, registration, updating and uninstalling
instructions for Mockups for Confluence Server when installed on your own server.
Using Confluence Cloud? If you are using Confluence Cloud (on atlassian.net), please see this article instead.
Usage instructions for the plugin are here.
Installation Instructions
Like most plugins, Balsamiq Mockups for Confluence Server is installed via Atlassian’s Universal Plugin Manager,
or UPM. Make sure you are running an updated version of UPM before attempting to install the plugin.
To install the plugin, go to the Confluence Administration page. Select “Find new add-ons” and search for
Balsamiq Mockups for Confluence Server.
Select “Free Trial” and accept the license agreement for Mockups for Confluence Server to begin the installation.
Once the plugin has downloaded and installed, you’ll be prompted to Log In with your Atlassian ID or MyAtlassian
account to obtain an evaluation key.
You will then begin a 30-day trial evaluation of Mockups for Confluence Server.
Registration Instructions
Please make sure you read the Balsamiq and Atlassian Marketplace FAQ first.
To register the plugin, go to the Confluence Administration page. Select “Manage new add-ons” and search for
Balsamiq Mockups for Confluence Server.
1/4

If you have UPM v.2 and want to buy from Atlassian Marketplace, you can use the Buy now button.
If you already bought a license from Atlassian Marketplace, you can paste it in the text area and click the Update
button to save it.
If instead you purchased your license directly from Balsamiq, you’ll either see a Configure button or a Configure
link (depending on your UPM version). Click on it and follow the instructions on the configuration page to paste
your License Information and see the status of your current installation.
If you have a Marketplace trial license installed, you might not see a Configure button at all. Delete your
Marketplace License Key and hit update to make the Configure button re-appear. This will allow you to enter a
Balsamiq-issued license instead.
Below are a few screenshots of what you can expect there.
This is what you’ll see if you don’t have a license installed and select the Balsamiq option.
This is what you’ll see if you have installed a license you purchase via Atlassian Marketplace.
2/4

This is what you’ll see if you have a license you purchased from Balsamiq but select the Atlassian option. Note
that an Atlassian Markeplace license, if installed, trumps any existing Balsamiq license.
If you receive an error when registering, this FAQ may help.
UPM still showing the plugin as “Unlicensed” or “Free Trial” after you install the Balsamiq-issued license? This
FAQ is for you.
Selecting Mockup Editors
If you purchased your plugin license via Atlassian Marketplace
All of your Confluence users will be able to access the plugin.
If you purchased your plugin license from Balsamiq
If your plugin license is lower than your Confluence license, you’ll have to create a Confluence user group called
balsamiq-mockups-editors and add people to it manually.
You can add and remove users to this group whenever you like, just make sure you don’t add more than what your
plugin license allows for or everyone will see a warning.
If instead you bought an unlimited version of the plugin, everyone will be able to create and edit mockups.
Updating Instructions
Click on the Update button on your UPM to download and install the latest version of the plugin.
3/4

If you are running an old version of Confluence and want to figure out which version of the plugin to update to,
head to the Support End of Life Policy page.
Uninstalling Instructions
You can uninstall the plugin from UPM.
The mockups created so far will disappear from the wiki pages because the {mockup} macro won’t be there any
more, but the mockup data (and images) will NOT be deleted, they’ll just be there in the attachments to the pages
they were created on.
Troubleshooting
If You Get an Error When Trying to Save Large Mockups
When saving large mockups, you might get a 2032 error. This is due to the fact that Tomcat has a 2MB default to
the maximum size of a POST request, which is what we use to save the mockup image.
The good news is that this default can be changed: just edit your confluence/conf/server.xml and set
maxPostSize to a higher value. Restart Confluence and you’ll be all set. Your Confluence might even run faster
because of it!
If you have other troubles, email us and we’ll help you!
Mockups and Adaptivist’s Theme Builder Integration
If you are using Adaptivist’s Theme Builder, you’ll have to manually add a “Add UI Mockup…” link to the edit menu.
Here’s how:
1. Go to Theme Builder’s Layout Manager (administration / themes / configure theme / layout manager)
2. Go to the Menus tab and click “Edit…” at the bottom
3. Go to the Edit Menu tab and add the following right under the “Comment…” compound-menuitem:
{menuseparator} {compound-menuitem:webui|location=system.content.add/space|
key=com_balsamiq_confluence_plugins_mockups_menu_addmockup| caption=Add UI
Mockup...}
4. Save your layout
That’s it! you will now see a nice “Add UI Mockup…” link in your edit menu.
4/4

Mockups Application Overview
docs.balsamiq.com/confluence/server/mockups2/overview
Balsamiq Mockups is made up of three major blocks. From top to bottom: the Application Bar, the UI library, and
the Mockup Canvas Each is described below.
The Application Bar
The application bar includes Menus, the Quick Add tool, and the Toolbar. Each is described below.
The Mockups menus should be pretty self-explanatory. The only tricky bit is that the Mockup menu contains
different items depending on what version of Balsamiq Mockups you are using. In general, that’s where you’ll find
the About Box and commands related to your mockup as a whole, like saving, exporting to XML or PNG, etc.
The Quick Add Tool
The Quick Add tool is the fastest way to add UI controls to your mockup. To use quick add, click inside the quick
add input box (or use the / or + keyboard shortcut to enter it). Type a few letters from the name of a UI control or
icon and Quick Add will show you a list of suggestions. Use your mouse or arrow keys to scroll down the list and
click Enter to add the control or icon on the mockup canvas.
For example, typing “bu” shows a list containing “Button”, “Button Bar”, “Help Button”, “Radio Button” and “Round
Button”. Typing “hel”, on the other hand, only returns “Help Button”. Pressing the ESCape key makes the list
disappear, as one would expect.
1/3

Try out Quick Add now! As you become familiar with it, you could even
hide the UI Library (through the View menu) and simply use Quick Add to
add UI elements to your mockup. This maximizes both your mockup
canvas area and your speed!
The Toolbar
The toolbar includes most of the same commands as the Edit menu: undo, redo, duplicate, cut, copy, paste and
delete. Not all versions of Balsamiq Mockups support the same keyboard shortcuts, so the Toolbar gives you a
handy way to perform common actions. Notice that you’ll find the same commands in the Property Inspector as
well.
The UI Library
The UI Library, or UI Controls Library, is the long strip of UI Controls just below the Application Bar. It lists all of the
different UI control types that Mockups supports, alphabetically. The main goal of the UI Library is to let you add
UI Controls to the mockup canvas, but you can also use it to see what’s possible and to get inspiration for your UI
mockup.
To add a new UI control to the canvas, simply select the control type you wish to add, then you can either “drag
and drop” it to the mockup canvas below or simply double-click and Balsamiq Mockups will place it on the
mockup canvas for you.
The UI Library can be positioned to the top, left, or right of the application window using the menu, View > UI
Library Position.
The Mockup Canvas
The rest of the application is the Mockup Canvas.
This is the main working area of Balsamiq Mockups, where your UI mockup comes to life. Once you add UI
controls to it, you can move them, resize them and tweak them to your heart’s content until your UI mockup is
ready.
2/3
The mockup canvas grows and shrinks with your browser or application window, so you can make room for bigger
mockups if you need to.
3/3

Working with UI Controls
docs.balsamiq.com/confluence/server/mockups2/controls
Adding UI Controls
To add new UI controls to your mockup, you can use the UI Library or type a keyword into the Quick Add tool.
You can also duplicate controls already on the canvas using copy and paste or the duplicate command
(CTRL/CMD + D).
Note: Full list of keyboard shortcuts here.
Selecting UI Controls
There are a few different ways to select UI controls. If you are familiar with graphics software, these should be of
no surprise.
Clicking on a UI control selects it
Dragging a rectangle which encloses many UI controls selects them
SHIFT+CLICK on a control adds it to the selection
SHIFT+CLICK on a selected control removes it from the selection
To select a control that is behind another control, right-click on the top control to bring up a menu that allows you
to select controls behind it.
Moving UI Controls
Once you have selected one or more UI controls, there are a few different ways to move it on the canvas.
You can drag it with your mouse (hold down the SHIFT key to maintain the original horizontal or vertical
position)
You can “nudge it” one pixel at a time with your keyboard’s UP/DOWN/LEFT/RIGHT keys
You can move it with bigger steps by holding down SHIFT and using your keyboard’s
UP/DOWN/LEFT/RIGHT keys
You can move your controls to be aligned in one direction by using the align tools found in the Property
Inspector
1/4

Snapping and Smart Guides
When you move objects on the canvas, Mockups tries to suggest alignment relative to other objects on the canvas
using smart guides. This makes alignment a little easier and makes your Mockups generally look neater.
If you ever want to temporarily disable this feature, you can hold down the CTRL key while moving or resizing, and
snapping will be turned off.
Resizing UI Controls
Resizing the selected controls is easy. You can just grab any edge or corner of the selection rectangle and drag it.
If you want to constrain proportions while dragging from a corner, hold the SHIFT key while dragging.
Another way to resize some controls to their “natural size” is to use the Auto-Size function found in the Property
Inspector.
Aligning UI Controls
You can align and distribute (space out) controls by selecting multiple controls and selecting the desired option
from the Property Inspector, as shown below.
Layering UI Controls
You can layer controls as if they were pieces of paper on the mockup canvas. To do so, you select the controls
you want to layer and select one of four layering commands available via the Property Inspector: bring to front,
send to back, bring forward and send backward.
Locking UI Controls
Locking a control will prevent it from being selectable. This can be useful for background controls that you want
to stay in place or don’t want to accidentally select (a browser or iPhone control, for example). You can lock a
control by clicking the lock icon in the Property Inspector.
2/4

To unlock a control, right-click on it when your mouse cursor is over it.
Deleting UI Controls
To remove some UI controls from the mockup canvas, select them and hit the DELETE key. Alternatively you can
click on the trashcan button in the Property Inspector or select “delete” from the Edit menu.
Rotating UI Controls
Some of our UI controls can be rotated via the Property Inspector (the label, image, and icon controls, for
example), but most can’t. If you are used to generic drawing tools this might be surprising. This limitation is
intentional, and not due to programming complexity (it’s not hard to add technically).
The reason we don’t support rotating all controls because we believe that in 90% of cases, it is not needed in
wireframes. In fact, adding the ability to rotate any control will likely result in wireframes that are very hard if not
impossible to implement by the development team.
If you feel that you need to rotate any other control, let us know on this forum thread and we’ll discuss whether to
add it together. A workaround would be to rotate a control in a drawing application and then import it as an image.
Grouping UI Controls
Sometimes you might wish to group some controls to better align them or to move them all at once. To group a
set of controls, select them and hit CTRL+G on your keyboard or use the Group command in the menu or Property
Inspector. The controls will change color to purple to indicate that they are grouped. Once grouped, the controls
will behave as one when moving or aligning. To ungroup controls, press CTRL+SHIFT+G on your keyboard or use
the Ungroup command in the menu or Property Inspector.
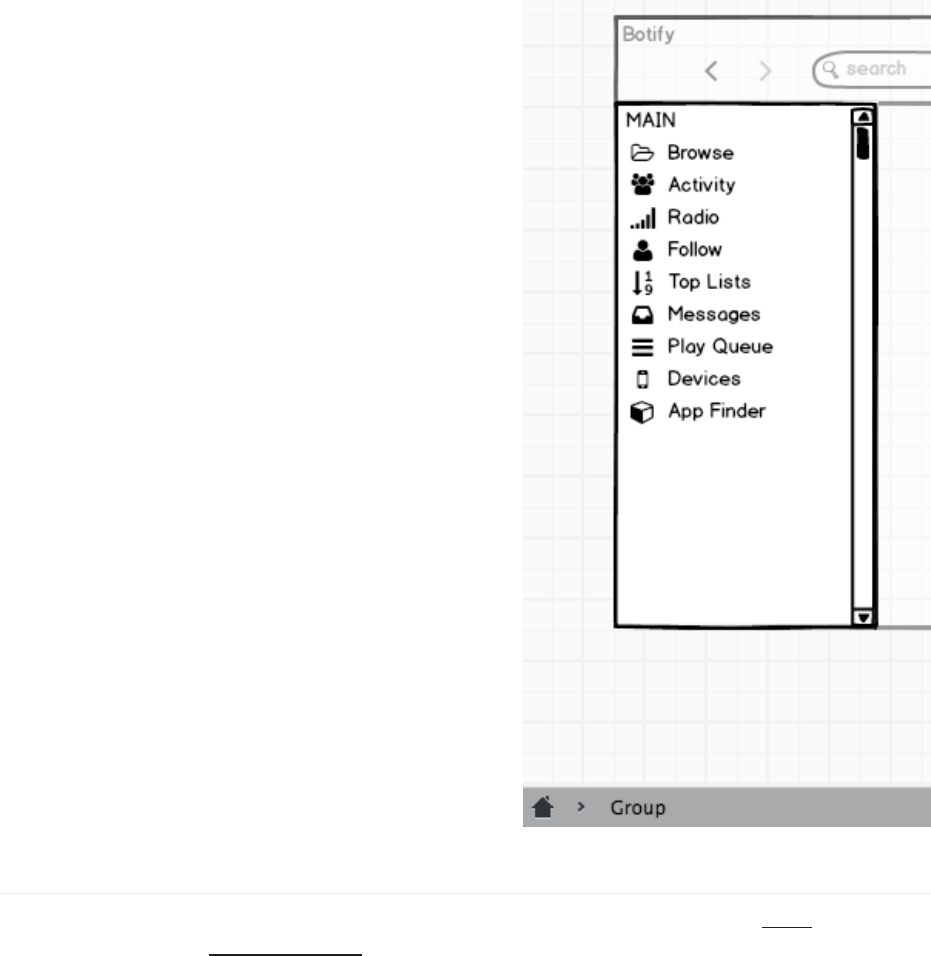
You can double-click on a group to “enter it” and edit its contents. A
small breadcrumb bar (at the bottom of the editor) will indicate that you
are editing a group and allow you to navigate back out of the group (you
can also use the Escape key). Groups can be nested, as shown below.
You can optionally give a group a name via the group’s property
inspector. This can be helpful when you have a lot of groups and need to
“know where you are” when you edit their contents. Naming and
grouping controls is also the first step to creating Symbols.
3/4
Cropping Groups
It is possible to crop (mask) a group of controls to only show a selected portion of it. When a group is selected, a
crop icon will show in the Property Inspector. Click on it to edit the visible area of the group.
The video below illustrates how to use this feature.
4/4

The Property Inspector
docs.balsamiq.com/confluence/server/mockups2/inspector
The Property Inspector (also called the toolbox, palette, property dialog, properties window, toolbar, floating
window, floating tool bar, properties box and control dialog) is the little floating rectangle that appears once you
select one or more UI controls. It allows you to perform some common functions such as copying/pasting,
layering, and aligning controls, as well as some control-specific customizations.
The Property Inspector is displayed when you select an object on the canvas. You can drag the Property Inspector
to move it; it will re-appear where you left it next time you need it. You can also make it smaller (so that only the
title bar shows) by clicking the collapse icon in the upper-left corner.
If your UI Library is visible, you can set the inspector to be docked over it. The View menu shows this option.
Common Inspectors
Editing Inspecto
r
Always present, always at the top. From left to right: undo, redo, duplicate, cut, copy,
paste, delete, group, ungroup, lock
Layering and Po
sition & Size
Always present, always in the second row (below the editing inspector). Layering, fro
m left to right: bring to front, send to back, bring forward, send backward. Position a
nd size shows you the size and position of the selection, in pixels. Clicking on the nu
mbers lets you edit them. The format is "X,Y WxH" where X is the x position, Y is the
y position (0,0 is top-left, growing right and down), W is the width and H is the height
of the selection.
Align Shown whenever more than one control is selected. Lets you align the selected ele
ments horizontally to the left, center and right and vertically to the top, middle and b
ottom. The next two icons distribute the centers of the selected items horizontally
or vertically. The last two icons space out the selected items evenly horizontally or v
ertically.
1/2
2/2

Working with Skins (Sketch vs. Wireframe)
docs.balsamiq.com/confluence/server/mockups2/skins
We know that some people need to shift from idea generation with internal teams to presentation with clients or
stakeholders, and in those situations the default “sketch” skin may present challenges with certain audiences. To
address this need, we created a “wireframe” skin that allows you to switch from a sketchy, hand-drawn style to a
crisper, cleaner wireframe elements.
Switching from Sketch to Wireframe Skin
To switch skins go to the View menu, select the Skin from the dropdown, and set the Skin setting to “Wireframe”.
The feature allows you to work on early ideas in the sketchy skin, and then later select a menu to swap out all of
your controls in the clean skin. All of your elements, including icons will be switched.
The screenshots below show a comparison of a sample design in the default “sketch” and “wireframe” skins,
respectively. Click to view larger images.
1/2

Which Skin Should I Use?
We’re glad you asked ;-) The short answer is that we still feel that the sketch skin is more appropriate most of the
time while using Mockups.
Our intention with adding the wireframe skin was to help add legitimacy to your Mockups when presenting them
to clients or stakeholders, people who may consciously or unconsciously discount the thought and effort of your
design work simply because it looks like it was sketched on the back of a napkin. We’d hate for all your hard work
to go unappreciated just because it doesn’t look “professional” enough!
However, while designing, the original sketch skin still offers all the advantages it always has. It deliberately looks
rough and tentative, which encourages you, the designer, to try out lots of different ideas, to experiment and revise
in order to come up with the best design. Designing in the wireframe skin could cause you to get attached to a
specific design idea too soon because it looks “done”, or it may prompt you to fine-tune the alignment, colors, or
fonts when you should be thinking about the workflow.
Just as the wireframe skin makes the design feel finished, the sketch skin makes the design feel un-finished,
which guides you to continue to ask questions and explore. The following description of the differences between
sketches and prototypes can also be applied to the sketch and wireframe skins, respectively.
Credit: Bill Buxton, Sketching User Experiences
So, while you can use the wireframe skin at any phase
of the design process, we don’t really recommend it
as an alternative to the sketch skin. But, rather, more
as a follow-up to it. It extends the functionality of
Mockups by making it more amenable to the
presentation or pitching phase of product
development, beyond just the ideation and design
phase.
Since the beginning, Balsamiq Mockups has been
optimized for that sweet spot of the ideation phase of
a project and will continue to be for the foreseeable
future. We still don’t have any plans to add fancy
interaction behavior to our family of products, for
example, and we’re just fine with that.
2/2

Working with Text
docs.balsamiq.com/confluence/server/mockups2/text
Many Mockups UI controls, such as Button, Label or DataGrid, have text in them. To edit the text, double-click on
the control and start typing. Or, if you have the control selected, simply hit Enter or F2 to start editing. To commit
the text you typed, simply click anywhere other than the text field you typed in or hit Enter or CTRL+Enter. If you
want to discard the text changes you just made, hit the ESC key.
Some controls use certain characters as separators. For instance, to create multiple tabs in a tabs bar, you
separate them with a comma.
Or, a space character separates tags in a Tag Cloud
control. Some other controls, like the Tree, use other
characters altogether. In such cases the default text
for the Control includes explanations on how to use it.
When editing text in a Label or Paragraph control you
will see a small number in the lower-right corner of
the editing box. This is the number of characters,
which can be useful for copywriting or other
purposes.
Basic Formatting
Text Style
You can use the following notation to format only certain parts of your control’s text.
for italic, use _this notation_
for a link, use [this notation]
for bold, use *this notation*
for disabled, use -this notation-
for underlined, use &this notation&
for strikethrough, use ~this notation~
for color, use {color:#FF0000}this notation{color}.
for font size, use {size:16}this notation{size}
All of the above syntax works around words separated by white spaces, and underline will work within words.
Notes:
1. The #FF0000 above is the color in HEX form, just like HTML. The macro will work with or without the pound
sign. You can also use certain color names (green, yellow, etc.) which you can find by moving your mouse over the
colors in the color palette in the Property Inspector.
2. See the next section for how to turn [linked text] into functioning links to websites or other mockups.
Here’s a screenshot of what the above text looks like in a Paragraph control, for instance:
1/4

The shortcuts will work almost everywhere where it makes sense, and you can combine them, so to make an italic
link use [_this_] or _[this]_.
Some controls like Paragraph or Label allow you to “unbold” the text via the Property Inspector panel. If you do so,
the words you *bolded* will stay bold. A few controls use bold text by default, so bolding text within those controls
won’t make a difference.
If you want to show these special formatting characters as actual text, you can escape the *, _, -, [ and ] characters
with \*, \_, \-, \[ and \], so if you want to write “this [is] some text” and don’t want the “is” to become a link, just type
“this \[is\] some text”.
Line Breaks
Most controls allow you to insert a line break to wrap text from one line to the next. You can do this by writing \r in
front of the text you want to start on a new line. See the example below where a line break is used in the second
item in a Radio Button control.
Bulleted Lists
In a paragraph control, you can create a bulleted list by preceding text with either a hyphen or an asterisk followed
by a space.
* item 1
* item 2
- item 3
- item 4
Making Links in Text Actually Work
If you are using the link notation above (e.g., [this is a link]), you can turn link-formatted text into actual links using
markdown syntax.
To do this, add the link destination in parentheses immediately after the link text. The link destination can be a
URL or the name of another mockup in the same folder. All the following formats are valid.
Web addresses:
[Google Home Page](google.com)
[Google Home Page](www.google.com)
[Google Home Page](http://www.google.com)
[Google Home Page](https://google.com)
Mockups in the same project:
[Features Page](features)
[Features Page](features.bmml)
Adding links in this way will cause them to show up in the Property Inspector as well, as shown below.
This text
2/4

results in
You can link specific strings of text as well as the whole control.
Note: If the whole control is linked, text links will be disabled. If the whole control is subsequently unlinked, the
previous text links will return.
More Macros
Lorem
Type lorem in a Paragraph or Text Area to use our Lorem Ipsum generator.
{Mockup-Path}
Type {mockup-path} (all lower-case) in a Label or Paragraph control to show the full path of the current mockup.
{Mockup-Name}
Type {mockup-name} (all lower-case) in a Label or Paragraph control to show the current mockup name.
Placeholder Text
Another option for creating placeholder text, besides the Lorem Ipsum text generator, is to use the Line of Text
and Block of Text controls.
3/4

4/4

Working with Data Grids / Tables
docs.balsamiq.com/confluence/server/mockups2/datagrids
The Data Grid control functions like many other text-based controls. It uses commas as column separators and
new lines as rows. A basic table with three columns and two rows would look like this:
First Name, Last Name, Email Address
firstname, lastname, [email protected]m
You can choose whether to show the first row as a header row in the Property Inspector, as well as specifying the
row height, row colors, and grid lines.
Text in the Data Grid can be formatted as bold, italic, etc. using the same syntax as other text controls.
Column Width Options
Mockups lets you specify individual width and alignment options for each Data Grid column.
Here’s a quick video showing how to do this:
Here are the details for creating column widths:
You have to add a special line of text as the last line of text in your table, and it has to be wrapped by { }
curly brackets
For each column, use 0 if you want the column to be as small as possible to fit the text in that column, or a
number
Numbers specify the relative size of columns, so {2,1} means “make the first column twice as big as the
second one in this two-column
grid. Or {70,20,10} means “in this 3-column grid, make the 1st column 70%, the 2nd 20% and the 3rd 10%
of the width of the whole table.
You can combine numbers and zeros, e.g., {1,0,4}
If you want to align column individually, add either L, C or R right after a number, like so: {0R,2L,1}, which
means “in this 3 column grid, make the 1st column as small as possible and always align it to the right,
the second twice as big as the third and always align it left, and use the Data Grid’s alignment (from the
property inspector) to decide how to align the 3rd column”.
Using Icons and Selection Controls in a Data Grid
Data Grid supports sort icons in headers using the following text:
Ascending: ^
Descending: v
Data Grids support a single checkbox or radio button in a table cell using the following text:
Checkbox: [] or [ ]
Selected checkbox: [x] or [v] or [o] or [*] or [X] or [V] or [O]
Indeterminate checkbox: [-]
Radio button: () or ( )
Selected radio button: (x) or (v) or (o) or (*) or (X) or (V) or (O)
Indeterminate radio button: (-)
Creating Line Returns in a Data Grid
1/2

Sometimes you want to create line returns in a table cell. To do this, you can use “\r” to create a line return.
The code example below would print on two lines.
Name\r(job title)
Pasting Data from Excel
Some people like to prepare tables in a spreadsheet application like Excel. You can copy and paste a range of cells
directly from Excel into the Data Grid/Table component. Just copy/paste and it will just work. It also works in the
opposite direction from Mockups to Excel.
Note: If you have commas in your cells, you will have to escape them with a backslash like this: 1\,000\,000
The component recognizes both commas and tabs as delimiters. Anything else should be populated into cells.
2/2

Working with Icons
docs.balsamiq.com/confluence/server/mockups2/icons
Balsamiq Mockups and myBalsamiq come packed with over 600 icons courtesy of the Font Awesome Icon
Library.
There are two ways to select an icon to use: the icon search and the icon library.
Icon Search
If the controls you selected support icons, you will see the icon search box in the property inspector. This works
much like the Quick Add tool: just type a few letters from the name of the icon you are looking for and a list of
suggestions will pop up. In this case, the list is a grid of icons to choose from. Just click on the one you want to
select it.
The Icon Library
If you’d like to explore all the icons that are available, click on the little down-pointing arrow to the right of the icon-
search box. This will bring up the icon library, where you can browse the icons by category and preview them at
different sizes. One trick is to double-click on the icon you’d like to select, instead of clicking to select and then
clicking on the “Select” button.
Once you have selected an icon, you can resize it, rotate it or remove it via the Property Inspector.
Adding Your Own Custom Icons
1/3

Note: Custom icons are not currently supported in our Mockups for Confluence and Jira server plugins. This
feature is coming in version 3!
If you’d like to get your own custom icons into your projects, these are the steps to follow:
First, you will need to rename the icon file so that it has “icon_” at the front of the file name.
Once your icon file is ready, you will want to open the asset
manager on either your home page, or the project page.
In the asset manager, choose whether the icon needs to be a site asset or a project asset, and then upload it.
Now the icon can be added to your mockups. Add an icon control to your mockup, open the icon library from the
property inspector and select the asset section (project or site) that you uploaded it to.
Best Practices for Creating or Preparing Your Custom Icons
2/3

Mockups works with color and transparency, but icons you add may not turn out looking as you want them to if
they’re not prepared to work the way Mockups expects them to. Below are some tips to get the most out of your
custom icons.
Color
Mockups uses black as a color for replacement at 100% opacity.
Icons that aren’t created with black can have undesirable effects when colorized.
We recommend using black as the color for your icons.
Transparent Areas
Mockups colorizes the entire opaque area of the icon.
For best results, we recommend knocking out “white” areas of your icon using transparency. Transparent
PNG works best.
The example below shows regular icons in the left column, a custom icon properly prepared with black fills in the
middle column, and a custom icon that doesn’t work as well in the right column. To fix the icon in the right column,
the exclamation point should be made transparent, and the icon color should be black.
3/3

Working with Images
docs.balsamiq.com/confluence/server/mockups2/images
Adding Images
To use images in Mockups, add an Image control from the UI Library and place it on the canvas. The Image drop-
down in the Property Inspector will allow you to select images that have already been imported/used in your
mockup or import a new one.
The Project Assets panel shows all images in your assets. If you have Site/Account assets, a tab will appear for
them. If you use web images or images using relative paths that are not project assets, those will show in the
Other Assets tab. On the desktop, you’ll also see a handy link to open the Account Assets folder when you click on
the Account Assets tab.
Click the plus icon in the upper right corner of the drop-down to choose a new image, or just double-click on the
Image UI control to quickly bring up the image browser dialog. You can choose images from your hard drive or
networked drive, or from the Web or Flickr. Mockups supports GIF, JPG/JPEG, and PNG image file formats.
If you are working on a saved file, you can also just drag an image from your computer to the Mockups canvas.
Note: The dragging feature is only available on the Desktop version of Mockups.
To rotate an image after it’s been imported, click the rotate icon next to the Image drop-down in the Property
Inspector. To convert an image to a black and white line drawing version, click the “Sketch It” checkbox in the
image import dialog or the Property Inspector.
1/2

To revert an image to the default placeholder image, click the icon in the upper left corner of the image drop-down
(the square with an ‘x’ inside it).
The image properties panel also allows you to crop or mask images to only show a selected portion of them. You
can watch a tutorial on cropping images here. Images that have been cropped will show an icon to remove the
cropping in the properties panel.
Aside from the Image control, you can also embed images in the Cover Flow control.
Copying Images to Assets
When you add images to Mockups, what we suggest is that you also add them to “project assets” so they will stay
organized with the project and may be re-used in other mockups.
Here’s how:
If your Mockup isn’t saved, Save your Mockup.
Add an image to your Mockup.
In the lower left corner of the Property Inspector, check “Copy to Project Assets” so this image will stay
organized with the project and can be re-used in other mockups.
After you add an image, it will be available in the Property Inspector.
Note: This will be automatically done in our web based versions since the image will be added to Project Assets.
Using Images as Custom Icons
Mockups also allows you to import your own icons. Importing an image with “icon_” at the front of the file name
will make it appear in the Icon Library, under the Project Assets category.
More details about Custom Icons can be found here.
2/2

Working with Markup
docs.balsamiq.com/confluence/server/mockups2/markup
Markup is a special kind of component in the UI Library that is used for adding annotations, comments, and
explanatory notes.
Commonly used Markup items include: Arrow / Line, Callout, Sticky Note, Red X, and Curly Braces. The screenshot
below shows the Markup button panel selected in the UI Library, and markup items on the page.
Toggling Markup on and Off
When you’re editing your mockups, you will sometimes want to see what the mockup looks like with Markup off.
You can do this by using the Show/Hide Markup toggle button in the upper right corner of the editor to the left of
the Presentation Mode button.
The screenshot below shows the previous page with Markup off, and the toggle button is displayed in the corner.
1/3

Markup Toggling with Keyboard Shortcuts
There are keyboard shortcuts for toggling visibility on and off.
Press CTRL+K on Windows (CMD+K on Mac) to toggle markup on and off.
In Full Screen presentation mode you can just press the “K” key.
Making Items Markup and Non-Markup
Sometimes you will want Markup items to be treated as non-markup or vice-versa. For example, you could use the
iPhone control as a guide for designing a mobile screen, but you might want to hide the iPhone itself when you
export it and view it on a mobile device.
If you want to make a Markup item Non-Markup, right click on the component and select the “Do Not Treat as
Markup” option in the context menu. This will allow the component to be visible when the Markup visibility toggle
is set to on or off.
You can use this “Treat As Markup / Do Not Treat As Markup” feature on any component. If you right-click on a
regular component, you can make it behave like Markup by selecting “Treat as Markup.” It will be hidden when you
toggle Markup visibility off.
2/3

3/3

Working with Site Maps
docs.balsamiq.com/confluence/server/mockups2/sitemaps
You can create simple site maps from a text outline using the Site Map control.
Create a Site Map
Add a “Site Map” control from the UI Library to the canvas.
Edit the control by double-clicking or selecting it and pressing the Enter key. Edit the outline to create parent-child
relationships. Each line represents a box (or page/node) in your sitemap. Use hyphens to indent child boxes
beneath a parent. Here’s an example:
Home
- Products
-- Product 1
-- Product 2
- About Us\rCompany
- Support
- Blog
This is what the outline above looks like:
Notes and Options
Single Tree Support: Site Map expects the first line to be the top-most parent, and only one of these can
exist because it only makes a single tree. If you want to make multiple trees, just add more Site Map
controls.
Multi-Line Text: You can use \r to create line returns on text in a box like this: About\rUs
You can’t resize Site Maps, but if you are unable to view the entire map on your canvas you can try
showing one of the nodes expanded in a separate Site Map, as shown below.
1/2

2/2

Linking Mockups Together
docs.balsamiq.com/confluence/server/mockups2/linking
You can link mockups together to create a simple prototype for your site or software application. This can be
useful for demonstrating click-through prototypes or for usability testing when you’re displaying your project in
Full Screen Presentation mode or as an exported PDF.
Linking mockups together is as easy as choosing a mockup name from a drop-down menu. Simply click on a
control that supports linking (most do, and here’s a workaround for those that don’t), and you’ll see a “Link” drop-
down in the Property Inspector (click the “Show Link Inspector” link if you don’t see it).
Note: To learn how to create links from text strings inside other controls, see our article on making links in text
actually work.
The list is pre-populated with the names of all the mockups in the same project as the mockup you’re editing.
For controls that can have multiple targets, you’ll see something like this:
Once you have selected a mockup or web page to link to from the pull-down menu, the control will show a little
arrow icon in the bottom-right corner. Links to mockups will show as a plain arrow, while links to web pages will
show as an arrow with a box around it.
1/2

Linking to a Web Page
You can also link to web URLs instead of other mockups, to show links to external sites or existing product pages.
To do this, select the “Web address…” option from the drop-down and enter a web URL in the dialog that pops-up.
Using Links in Presentation Mode
When you’re done linking your mockups up you can enter Full Screen Presentation mode and you’ll be able to click
on the links you set up to test your prototype.
Controls with links will have a red overlay on them and mousing over them will show a big hand pointer with the
name of the target mockup or web page for the link.
Click on a link to show the referenced mockup or web page. Clicking
on a control that has a web link will open a new browser window
when in Full Screen Presentation mode or in a PDF.
One more thing: you can use the left and right arrow keys on your
keyboard to go back and forth between the mockups you have
visited in your run-through.
Here’s a screencast (1:21 long, no audio) showing linking up some
mockups and running through the resulting prototype:
You can view the full tutorial for creating these mockups here.
2/2

Presenting Your Work
docs.balsamiq.com/confluence/server/mockups2/fullscreen
Mockups includes a “Full Screen Presentation” mode for those times when you need to present your wireframes
to other stakeholders.
To enter Full Screen Presentation mode, just click on the full-screen icon in the top-right corner of Mockups, or
select “Full Screen Presentation” from the View menu.
Mockups will expand to take up your whole screen (to eliminate distractions), and your mockup will be centered
on the screen.
You will also see three little buttons in the lower-right corner of your screen. They’ll fade out in a few seconds, but
you can always bring them back by mousing over the bottom-right corner of the screen.
The first toggle is for showing and hiding linking hints and the big pointers. You can
turn them off if you’re using the presentation mode to test a new UI on some user
and don’t want to give them hints on where to click, or simply if you find the big
pointer distracting.
The second toggle is for showing and hiding markup elements, such as Sticky
Notes, Arrows and Callouts (any control under the “Markup” tab in the UI Library). This is useful if you want to just
look at your UI without the annotations that surround it.
The third button lets you exit full-screen mode and edit the mockup you’re currently viewing.
To exit Full Screen Presentation mode, just hit the ESC key.
1/1

Keyboard Shortcuts
docs.balsamiq.com/confluence/server/mockups2/shortcuts
Note: Some of these shortcuts do not work in our web versions, depending on which browser and operating
system you are using.
Below is a list of all the keyboard shortcuts and modifiers which you can use in Balsamiq Mockups.
Choose one of the links to the right to download a cheat sheet.
Working with Controls
Selection
Edit the selected control's text ENTER or F2
Add to selection SHIFT +CLICK
Toggle selection CTRL +CLICK
Select All CTRL + A
Deselect All CTRL + SHIFT + A
Size / Position
Resize maintaining aspect ratio Hold SHIFT
Disable snapping during move or resize Hold CTRL
Increase font or icon size CTRL + ]
Decrease font or icon size CTRL + [
Nudge selection 1px
↑ ↓ ← →
Nudge selection 20px SHIFT + ↑ ↓ ← →
Nudge-Resize selection 2px CTRL + ALT + ↑ ↓ ← →
Nudge-Resize selection 20px CTRL + ALT + SHIFT + ↑ ↓ ← →
Pan the canvas (Hand tool) SPACE BAR +Click and Drag
Bring to front CTRL + SHIFT + ↑
Send to back CTRL + SHIFT + ↓
Bring forward CTRL + ↑
Send backward CTRL + ↓
Clone selection ALT +drag
Edit/History
Undo last command CTRL + Z
1/4

Redo last command CTRL + Y
Cut the selected controls CTRL + X
Copy the selected controls CTRL + C
Paste CTRL + V
Paste In Place CTRL + SHIFT + V
Delete the selected controls DELETE or BACKSPACE
Duplicate the selected controls CTRL + D
Lock the selected controls CTRL + 2
Unlock all locked controls CTRL + 3
Group
Group the selected controls CTRL + G
Ungroup the selected groups CTRL + SHIFT + G
Align
Align selected controls left CTRL + ALT + 1
Align selected controls center CTRL + ALT + 2
Align selected controls right CTRL + ALT + 3
Align selected controls top CTRL + ALT + 4
Align selected controls middle CTRL + ALT + 5
Align selected controls bottom CTRL + ALT + 6
Working with Icons
Navigating the Suggestion List
↑ ↓ ← →
Using the selected icon
ENTER
Closing the Icons Library
ESC
Closing the Suggestion List
ESC
Working with Text
Start Editing text of the selected
control
ENTER or F2
Committing the current text ENTER (single-line controls), CTRL + ENTER (multi-line con
trols) or click anywhere
Ignoring the current edit
ESC
Grow/Increase Text Size CTRL + ]
Shrink/Decrease Text Size CTRL + [
2/4

Text Formatting
italic _text in underscores_
link [text in brackets]
link with a target [text in brackets](mockup_name) or [text in brackets](websit
e_url)
bold *text in asterisks*
disabled -text in hyphens-
strikethrough ~text in tildes~
font point size {size:12}text{size}
color (hex value or color name) {color:#ff0000}text{color} or {color:red}text{color}
To type a literal *, , − -, or [] in a control, escape it by prefixing it with a \ (backslash): \*, \, −\-, \, [\]
Special Text Macros
Lorem-Ipsum generator type _lorem_ in a Paragraph or Text Area. Try _l0rem_ for a v
ariation.
Show the full path of the current mocku
p
type _{mockup-path}_ in a Label or Paragraph control
Show the current mockup name type _{mockup-name}_ in a Label or Paragraph control
Quick Add
Sending focus to Quick Add / (forward slash) or + (plus sign)
Navigating the Suggestion List
↑ ↓ ← →
Closing the Suggestion List
ESC
Sending focus back to the Canvas
ESC
Working with Mockup Files
New Blank Mockup CTRL + N
New Clone of Current Mockup CTRL + SHIFT + N
Open a mockup file CTRL + O
Save the current mockup file CTRL + S
Save as... CTRL + SHIFT + S
Close current mockup CTRL + W
Close all mockups CTRL + SHIFT + W
Export this mockup's XML CTRL + E
Import mockup CTRL + SHIFT + E
3/4

Export Snapshot to Clipboard CTRL + SHIFT + C
Export Snapshot to PNG CTRL + R
Export All Snapshots to PNG CTRL + SHIFT + R
Print mockup CTRL + P
Quit Balsamiq Mockups CTRL + Q
Looping through the open files in Mock
ups for Desktop
CTRL + TAB and CTRL + SHIFT + TAB
Views
Hide/Show the UI Library CTRL + L
Enter Full Screen View CTRL + F
Exit Full Screen View
ESC
Show/Hide Markup CTRL + K
Zoom In CTRL + + (plus sign) or CTRL +mouse scroll up
Zoom Out CTRL + - (minus sign) or CTRL +mouse scroll down
Zoom to Actual Size CTRL + 1
Zoom to Fit CTRL + 0
4/4
